Landscapes with the X Series
Back when I first switched to Fuji around 6 months ago I was already pretty convinced that the X Series cameras would be ideal for travel because of their size and weight but at the time I wasn’t totally sure that I would be able to use them as my first choice landscape camera.
I’d been using a Nikon D800E for a number of years and wasn’t sure whether the X System was really designed with landscape photographers in mind. In my last blog (HERE) I tested the image quality of the X-T10 with the 10-24mm and 55-200mm zooms against my Nikon and found that while there is obviously a resolution difference, the difference in detail and quality was negligible.
Since then I’ve used both the X-T1 and X-T10 extensively for landscapes both at home in Portugal and while travelling around Indonesia for a month last summer. My first landscape shoot with the X-T10 was when I led a workshop for a sunrise shoot at Lisbon’s iconic Vasco da Gama bridge. I was impressed by how intuitive it was to use and all the controls for exposure adjustment quickly became second nature; aperture adjustments on the lens barrel, shutter speed adjustments either via the dial on the top or the rotating wheel on the front, and ISO by clicking the front wheel in and turning. It was incredibly quick and easy to rapidly alter exposure settings in changing light and switching between long exposures with a Lee Little Stopper and shorter exposures without the neutral density filter, and with the realtime exposure feedback through the EVF and LCD you know exactly what you’re going to get before you press the shutter. This was even true with some longer exposures up to around 10 seconds. Additionally, the articulating screen is incredibly useful for tripod shooting and overall I found the camera a pleasure to use.
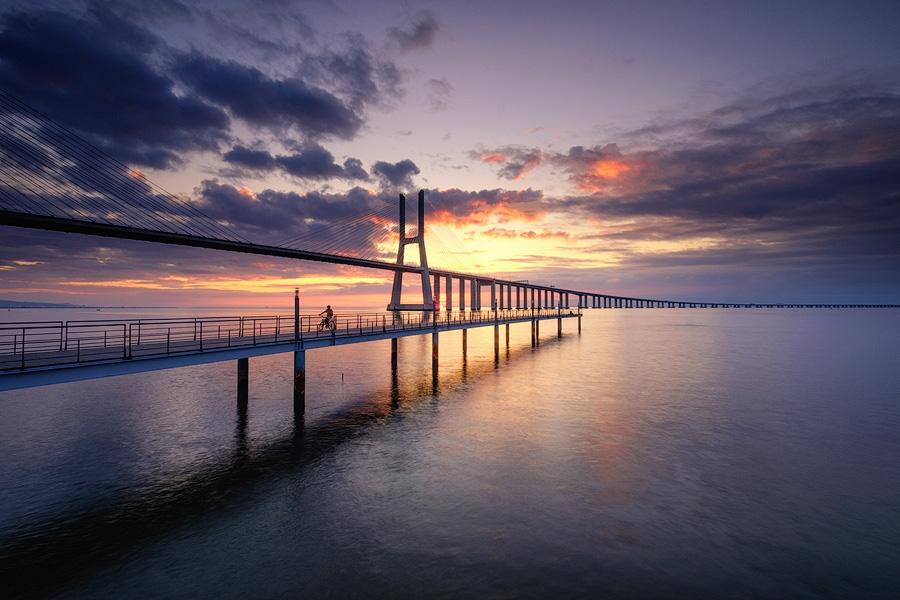

I was also using the Fuji MHG XT10 metal handgrip which is grooved along the bottom enabling it to connect with an Arca Swiss style tripod plate. This is great as it means I don’t need to have an additional quick release plate attached to the camera, and the handgrip fits with my Really Right Stuff ball head while also allowing access to the battery/SD card compartment.
When I got the RAW files onto my computer and into Lightroom and Photoshop, I found they were quicker to edit than my Nikon files, which can sometimes take quite a while to get the best colour and contrast from. The Fuji files have lots latitude in both the shadows and highlights, and getting the colour, contrast and sharpness to a level where I was happy with them was incredibly simple.
Some of the landscape shots in Indonesia put the camera through its paces, not only in terms of image quality but also in the fact that I was shooting in some dusty or spray filled environments. The image below was shot with the X-T1 and 14mm f2.8 at dawn at Mount Bromo in Indonesia
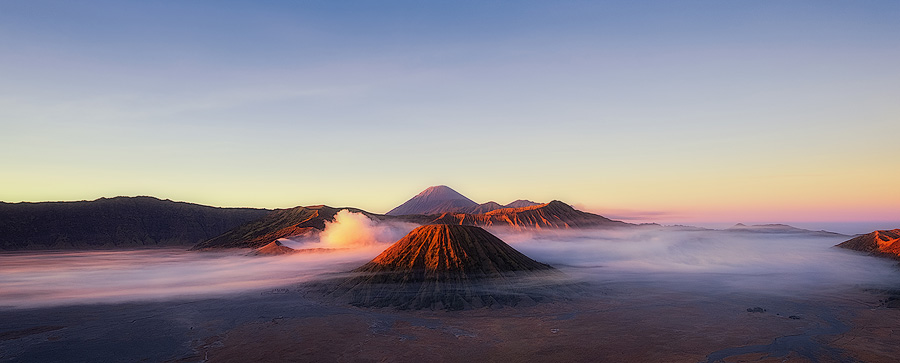
While I had the X-T1 set up on my tripod to shoot the volcano I noticed that to my left the mist was filling up the volcano caldera and then slowly overflowing and running down the valley as first light broke across the mountain. Rather than move my X-T1 from the tripod, I used the X-T10 which already had the 55-200mm telephoto zoom attached to capture the scene handheld. I increased the ISO a little to ensure a faster shutter speed, which combined with the OIS on the lens gave me pin sharp images.
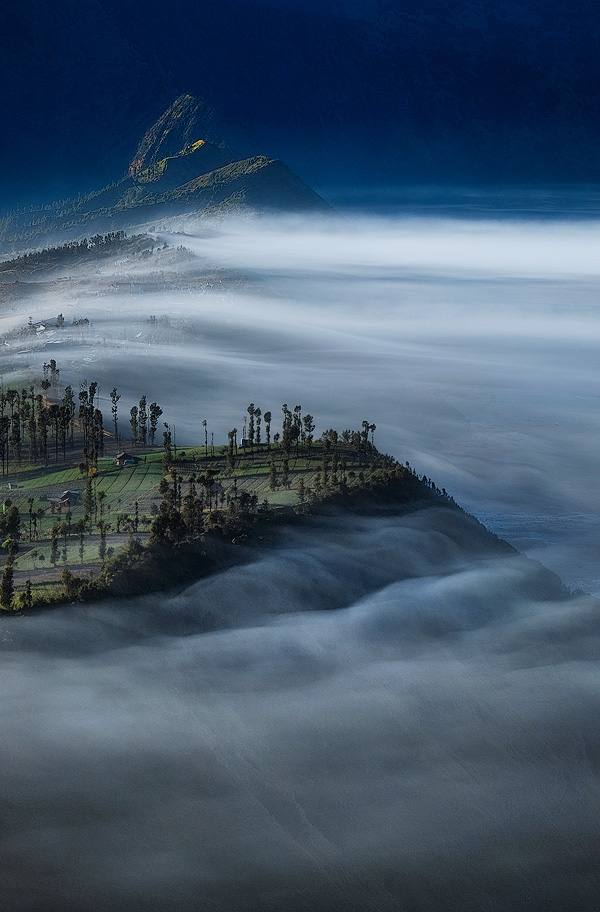

It was a steep climb in the dark to get to this location and back when I’d used a heavy dSLR I almost certainly wouldn’t have carried two bodies with me but on this morning the fact that I had both the X-T1 and the X-T10 meant I could shoot two different scenes from the same spot practically simultaneously, capturing the peak light in both.
For the record, the two Fuji bodies combined weigh a little over 800g which is less than my old 898g D800. The two lenses I most commonly use for landscapes are the XF10-24mm and XF55-200mm, which together weigh 998g. The two equivalent Nikon lenses, the 16-35mm and 70-200mm f4, weigh 1530g so that’s more than half a kilo more for two lenses which are optically inferior to the Fuji XF lenses. Added to this is the fact that with the lighter Fuji system I don’t need such a robust tripod. I used to use the a Gitzo Mountaineer series 2 with a Gitzo ball head, which was a pretty lightweight system at 1780 grams, but I can now use a Gitzo Traveller series 1 with a Really Right Stuff Ultra Light ball head which weighs 1120 grams, 660 grams less. I can also use a smaller lighter backpack, which means even with the two Fuji bodies I made the morning hike up Bromo with over 1.5kg less on my back!
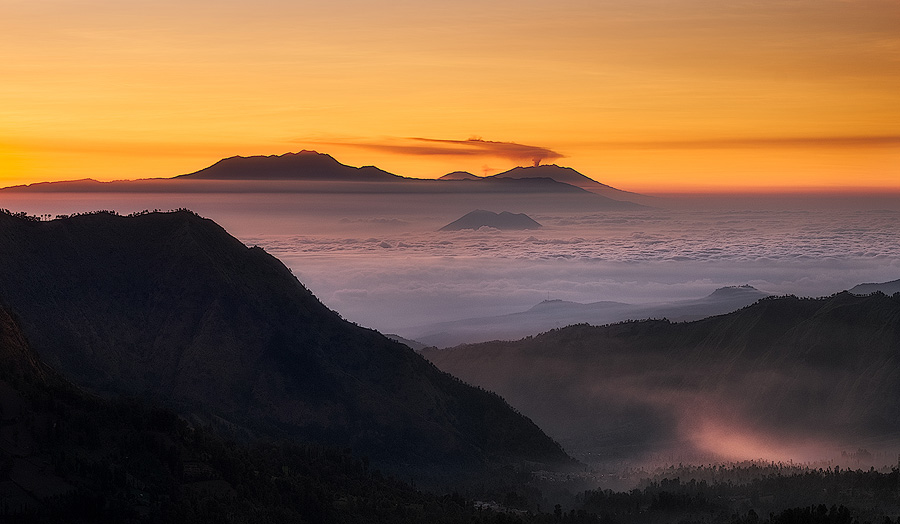
Here are a few more images I took with the X Series in Indonesia


Since returning from the trip I’ve continued to use the cameras for landscapes, occasionally in conditions that challenge the camera a little. A couple of times I’ve been out shooting this winter in persistent or heavy rain, and despite getting pretty wet the X-T1 has operated perfectly. The image below was taken at Lisbon’s Port Authority building in quite a heavy rain storm. The camera operated perfectly but I had a little trouble keeping rain of the neutral density filter.
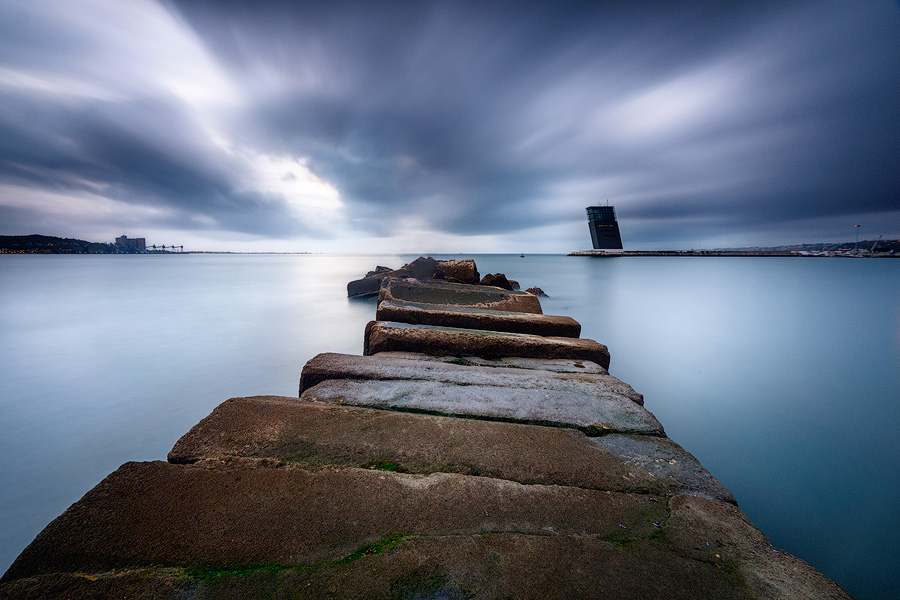
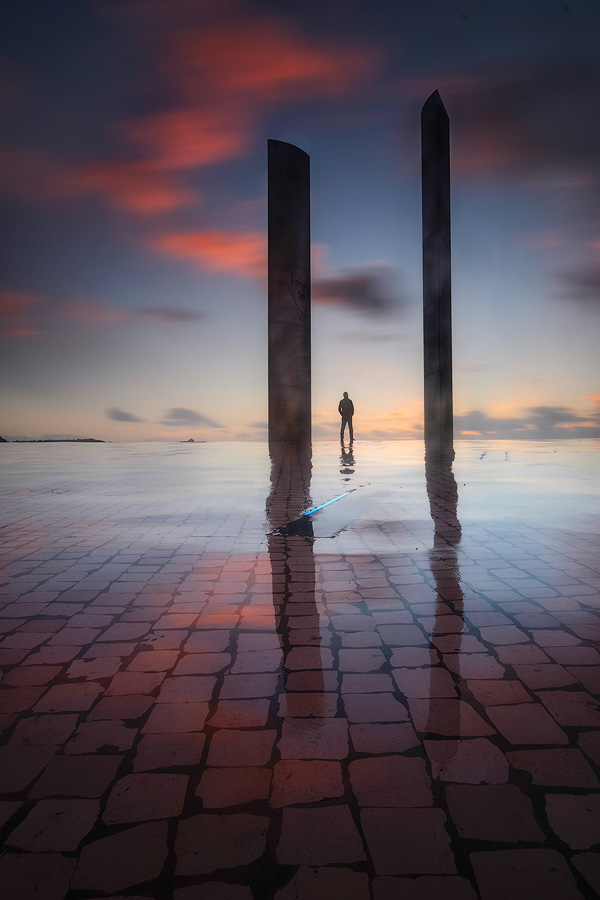
It was also raining when I photographed the Champalimaud Foundation in Lisbon. I used the reflections in the wet stones for foreground interest and also to provide leading lines in the composition, which meant getting the tripod really close to the ground. With my old Nikon system I would have had to kneel on the wet ground to check the viewfinder of LCD for composition, but with the X-T1 though I can just flip up the LCD screen which not only keeps me dry but also saves my knees.
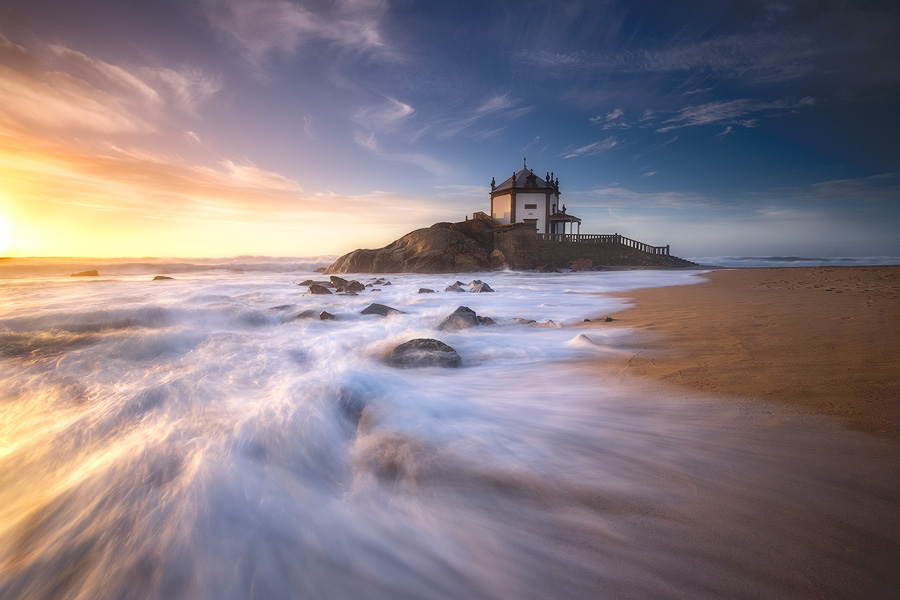
One of the most challenging locations for cameras, and the kind of scenes that I enjoy shooting a lot, are seascapes. I was in the north of Portugal over Christmas and took the opportunity to shoot Capela do Senhor da Pedra, a tiny chapel perched on rocks between the Atlantic ocean and the beach. It’s a fact of seascape photography that the best compositions ALWAYS involve actually getting into the water, which also means having the camera pretty close to the water as well. There’s no getting around the fact that the camera is going to get drops of salt water on it at the very least and of course it’s also exposed to sand, salt and spray, which isn’t the best friend of electronic devices like digital cameras. Despite all this the X-T1 never missed a beat and I was completely comfortable using it whilst standing in the ocean in front of incoming waves. The flip up screen for the rear LCD is extremely useful here as it allows me to constantly see what the waves are doing which is much more difficult when I have my eye pressed against a view finder, and once again the articulating LCD saved me from crouching down in the water to get a better view of the screen.
So after 6 months of using Fuji I’m completely convinced that it is perfect as a landscape system. The controls are all fantastically intuitive and being able to see and control everything without using the viewfinder or LCD is brilliant for tripod work. Being able to see exactly what I’m going to get and seeing how the exposure changes affect the image on the LCD or EVF before I’ve actually fired the shutter makes measuring exposure in rapidly changing light incredibly easy. The weight of the system, not just the camera bodies, but the entire system from lenses to tripod and backpack make it so much more pleasurable to carry around in the filed, and Fuji glass, particularly the 10-24mm, the 14mm and the 55-200mm, all make excellent landscape lenses. Over the next 18 months or so I’ll be heading to the Azores to shoot seascapes, to northern Norway to shoot the aurora, and to the Dolomites to shoot mountains. All of these will put the camera in a challenging environment and all of them will involve a fair bit of hiking. I can’t wait to see how the X System copes with it and I don’t doubt for a second that it will be fantastic.


Martin Murray
January 22, 2016 @ 9:57 pm
Beautiful images!
Andy Mumford
January 30, 2016 @ 7:29 pm
Thanks Martin
Barry V
January 29, 2016 @ 2:59 am
Great images. I would like to know a couple of things, why are you using f16 and greater when diffraction sets in after f11 and f11 gives great DOF with the 10-24 lens. I would also be interested in an article regarding your Lightroom workflow and settings as well as your method of sharpening for the web. The images have a great sharpness about them without looking over sharpened.
Andy Mumford
January 30, 2016 @ 7:47 pm
Hi Barry
I’d have to recheck the files but I suspect the shots that are done at f16 or above are longer exposures where I’ve been trying to make the exposure longer in conjunction with using a filter to create get a particular shutter time. Generally I shoot landscapes around f11 unless a desired shutter time dictates that I have to close the aperture down more.
As for my post processing workflow, I’m thinking of doing a blog on it at some point, but most of what I do has been picked up from other photographers here and there and then mixed in with my own workflow. I do almost nothing in Lightroom, just White Balance adjustments and lens calibration stuff. The majority of my workflow is in Photoshop using something called Luminosity Masks, which were pioneered by a guy called Tony Kuyper. He has an astonishing amount of information and free tutorials on his website. http://goodlight.us/writing/tutorials.html
I basically just play around with levels adjustments only in the midtones using luminosity masks that select only the midtones. I’ll then pull in the highlights with a luminosity mask that selects only highlights, and then do some dodging and burning. I also occasionally use Nik Color Efex Pro to re-adjust white balance and vibrance.
There are other ways of doing similar things, for example Nik Color Efex Pro has a nice way of selecting particular tones and areas of a photo, but I’ve got used to Luminosity Masks and find the control and effect I can get with just a few simple adjustments really suits the look I want to achieve with my landscape photos.
For web sharpening I use an Action from the same photography, Tony Kuyper, which works along a principle that an image is reduced in size to 1.66x it’s final output size and then slightly over sharpened. Then the image is resized to it’s final output size and all the artefacts disappear, leaving the image looking crisp. I’m over simplifying quite a bit here, so it’s worth having a look at his tutorials although there’s a lot to take in.
At some point in the future I’ll get round to pulling all the different things together and writing them up in a blog.
Barry V
April 11, 2020 @ 2:51 am
Hi Andy
Thanks for your detailed reply. I’m actually using Tony’s V4 panel in Photoshop now and have been using Luminosity Masks for some time with Lights, Darks and Midtone actions I created myself from Tony’s info but in the end bit the bullet and bought the panel. I’ve used the sharpening as you described from the panel but at the default of 50% opacity thought them to be slightly oversharpened. I develop my RAF’s in Capture One and like you do most of the heavy lifting in Photoshop. Looking at the images again maybe the look you have has more to do with the micro contrast rather than the sharpness it’s almost 3D …….. whatever it is they look brilliant!
Their is a very steep learning curve to the Luminosity Masks so I am looking forward to your future posts on the subject. I very much enjoy a blog such as this with varied contributors, keeps things interesting.
Barry
http://bjustice.zenfolio.com/
Barry V
January 31, 2016 @ 4:26 pm
Hi Andy
Thanks for your detailed reply. I’m actually using Tony’s V4 panel in Photoshop now and have been using Luminosity Masks for some time with Lights, Darks and Midtone actions I created myself from Tony’s info but in the end bit the bullet and bought the panel. I’ve used the sharpening as you described from the panel but at the default of 50% opacity thought them to be slightly oversharpened. I develop my RAF’s in Capture One and like you do most of the heavy lifting in Photoshop. Looking at the images again maybe the look you have has more to do with the micro contrast rather than the sharpness it’s almost 3D …….. whatever it is they look brilliant!
Their is a very steep learning curve to the Luminosity Masks so I am looking forward to your future posts on the subject. I very much enjoy a blog such as this with varied contributors, keeps things interesting.
Barry
http://bjustice.zenfolio.com/
Mark Devereux
January 29, 2016 @ 3:39 am
Really outstanding work – thanks for sharing!
Andy Mumford
January 30, 2016 @ 7:29 pm
Thanks so much Mark
Jake Hall
September 1, 2016 @ 5:32 am
I may be a little late to the party here (better late than never i suppose) but which filter kit/size did you use on the fuji 10-24?
Andy Mumford
September 11, 2016 @ 12:02 pm
Hi Jake
I use Lee 100mm filters on the 10-24mm. I’d love to be able to use the smaller Lee Seven5, but they cause vignette below about 14mm. The filter ring on the lens is 72mm and the Seven5 system is only 3mm wider than that, so you can imagine that it’s possible to see the edges of the filter holder in the corners of the frame when your shooting really wide.