How to edit and apply ‘sharpen’ to pictures from Fuji X-T1 in the Lightroom
I must be Lightroom user since I was born. Or since the first teeth started to appear. Or perhaps since 2007-2008. At first, the interface seemed strange, it was too complicated. But I didn’t give up at first, and in a short time I was able to use it without major problems.
By then I used a Canon 400D. However, in late 2008, went for the Canon 50D. In early 2010 fell in love with Canon 5D MK II and, almost inadvertently, in the last months of 2012 falls in my hands the 5D MK III. I’m yet to know how it happened. And also my wife that, I think, did not believe much this story…
And, across all these changes of equipment, there he was, always accompanying me: Lightroom. In late 2015 there was no longer big secrets from him to me. I treat it by “you”, though, every development of this software, there appears one or two new tools.
And I do practically everything in Lightroom. For me, each of the photographs that I decide to edit, has to be more or less in a good shape from the moment that I do it on the camera. If I start editing and spend more than five minutes a picture, for me it is no longer good and I go for the next one. Eventually, if I need any Photoshop tool, I edit from Lightroom itself. Then, when I record in the PS, it automatically becomes part of the LR library. And (again) for me, this LR’s ability to manage as well the huge picture lot that I have, it’s virtually priceless…
At the end of 2015 I gave the step I had been thinking to a few months ago: try the X system from Fuji. I bought the X-T1 and the 18-55mm and 55-200mm lens. I think that ,for whatever reason do not adapt to the system, it will be easier to sell this material in the kit form. With the 5D MK III and all Canon equipment leaning against a corner, I spent three weeks trying the new acquisition. And there was a new girl in the neighborhood. I felt in love with the X-T1 so that I did not hesitate in acquiring the 14mm and 35mm f/2. The Canon stuff? Sold in the twinkling of an eye, without looking back… or almost, because for some hours I was undecided if kept with it or not. Today I don’t miss anything. Really! But lets go ahead…
For almost nine years I acquired a way to work with the LR that pleased me. My workflow was relatively simple and had no secrets. Usually, the last thing I did was to apply the sharp in the image before exporting. And this process never went wrong.
But, however, it comes the first time I import the pictures from Fuji and open them in the LR. And just this minute I see that the way to edit will undergo some adjustments. The latitude of the X-T1 files, mainly in the shadows, is something fenomenal. The 5D MK III had never left me down, but the X-T1 further elevates the ability to pull the details in dark areas – there isn’t so much noise to emerge. Also, when shooting, I can now rely a little more on some possible underexposure.
In the highlights it is also easy to get information, although here the Canon 5D MK III stands alongside with the X-T1. As I shoot often at times of sunrise and sunset, I began to experience the color profile “Vivid”. As the colors are so saturated, there’s no need to move the ‘Vibrance’ and ‘Saturation’ in LR. Here and there I proceed to the increase of contrast and exposure and not much more.
But where I was getting at is that, after small adjustments carried out, it was time to apply the sharp to the X-T1 file and it was here that I came across something “weird.” Contrary to what I had always done with the files from Canon, now I couldn’t move freely the ‘Sharpening’ bar in LR. By increasing the value ‘Amount’ I would simply “brake” the image with artifacts hard to conceive. And by increasing ‘Masking’, in certain areas of the photos appeared the so-called effect of watercolor/paint. Would I had to change my way of working? Should I abandon the LR?
Then I decided to search the Internet and found some interesting solutions that have helped me in the edition of the Fuji files. In one of them, the “trick” was to not increase almost nothing the values of ‘amount’ or the ‘Radius’. The ‘Detail’ can practically reach the maximum. Nor should overdo the ‘Masking’. Ok, the pictures looked really better than like when I was trying to edit as I did with the files from Canon.
Yet I still tried other software options, with Capture One at the head. Okay, I did some testing, I exported some pictures and enjoyed the results. But honestly, I was expecting more noticeable differences and, after passing pictures to the paper, it was not so evident. In other words, I concluded that it would not change a whole way of working to earn something that practically, only increasing 100% on a screen, there was noticeable difference.
And so I continue to work the Fuji files in LR, but in a way I had never thought of doing with the Canon. I edit the Raw or, if the picture almost does not require editing, I edit the JPG where sharp is already well applied by the camera sensor.
But – yes, but – Google decides to offer the NIK Collection and everything, or almost everything, has changed. I start by evaluating the pictures. If I like the exposure on the JPG file, is in it that I make any minor adjustments. In RAW files I no longer apply any sharp in the LR. After editing the file, from the “inside” of Lightroom I call the plugin NIK Sharpener Pro: Output Sharpener. And, within the window of this plugin it has a number of options that allow you to reach an excellent result with the Fuji files, without the “spoiling” with the LR sharp. After editing, doing Save in the plugin, the photo will be available in Lightroom and its database.
Following there is a practical guide of editing an image from the Fuji X-T1 in RAW format.
[You can download the original file in here]
1 After importing the RAW file, I go to the ‘Develop’ mode. In this window, in the right toolbar, I will go to the end of it, to the ‘Profile’ menu. Here there are available the various modes of film simulation, as I have available in my X-T1. For this, as an example, I will select the ‘Camera VELVIA/VIVID’ option. As surely you noticed, the colors become more saturated. On the other hand, increased the contrast and the dark areas became darker. But it’s over there that we will follow now.
2 Except for the issue of the shadows, the exposure is balanced, as shown in the histogram. Has also contributed the use of a filter ND Grad 0.9 (3 stops) to retain information from the sky, as this time of day, early morning, there is a huge contrast between the light of the earth and sky. Thus, following some of the LR own logic, let’s start at the top. As I mentioned, the exhibition is more or less well done. Not worth increasing the contrast, so the first option is to retrieve some information from sky, especially in the sun area. For this there is the ‘Highlights’ option, whose value decreases.
3 Following, I will take care of the shadows, since it is the most “problematic” at this point of the image. For this nothing better than increasing the value ‘Shadows’ in order to retrieve some information and details of dark areas. I even increased slightly the value ‘Blacks’ to decrease the amount of pure black.
4 Briefly, the ‘Clarity’ tool has the ability to increase the local contrast of an image, giving it a sense of three-dimensionality. However, you should be careful in applying it, because its excessive use will lead to the creation of unesthetic halos – actually, this rule should be applied to all the other tools and options. In other words, it’s a similar tool to increase sharpness combined with the contrast.
5 The Tone Curve tool, with its many options, it’s excellent if you want to increase selectively the contrast (and not only) of an image. But for this picture I don’t feel that there is need for it. If I had to move, it would be to decrease, albeit very slightly, the value ‘Lights’.
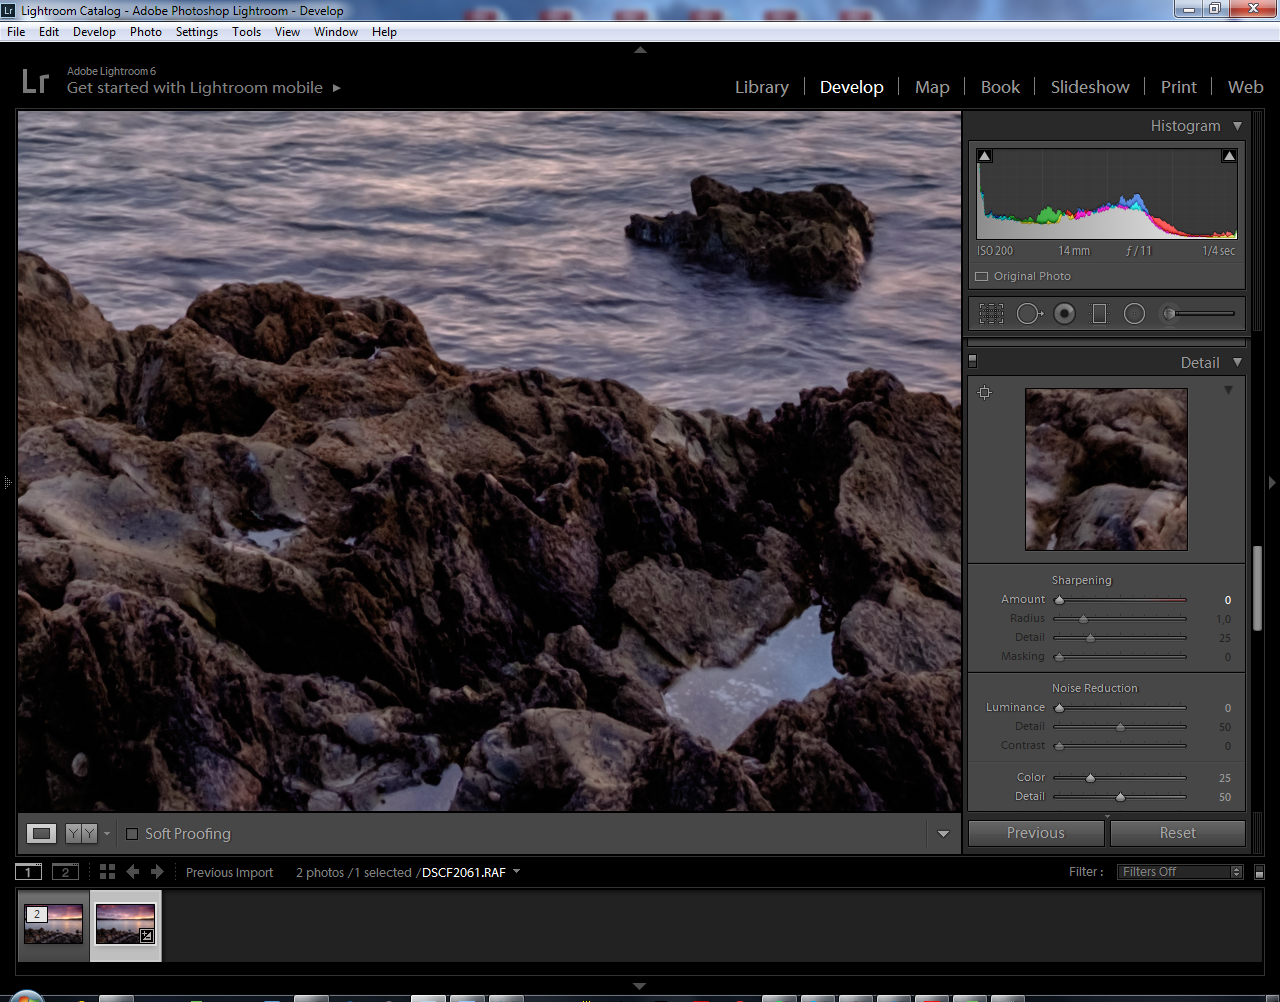
6 Although they have application in some pictures, for this example will strike the tabs ‘HSL / Color / B & W’ and ‘Split Toning’. And basically, we’re almost at the end of the processing of this particular photo. We enter the chapter sharp. As the LR does not go along very well (for now) with the Fuji files, at least to increase the level of detail, you can start trying to raise the value ‘Amount’, ‘Radius, and others. There will appear, almost certainly, artifacts that “spoil” the image. The solution is to only increase the ‘Detail’ value almost to the maximum. The ‘Amount’ may rise about 5 points, as do the ‘Masking’.
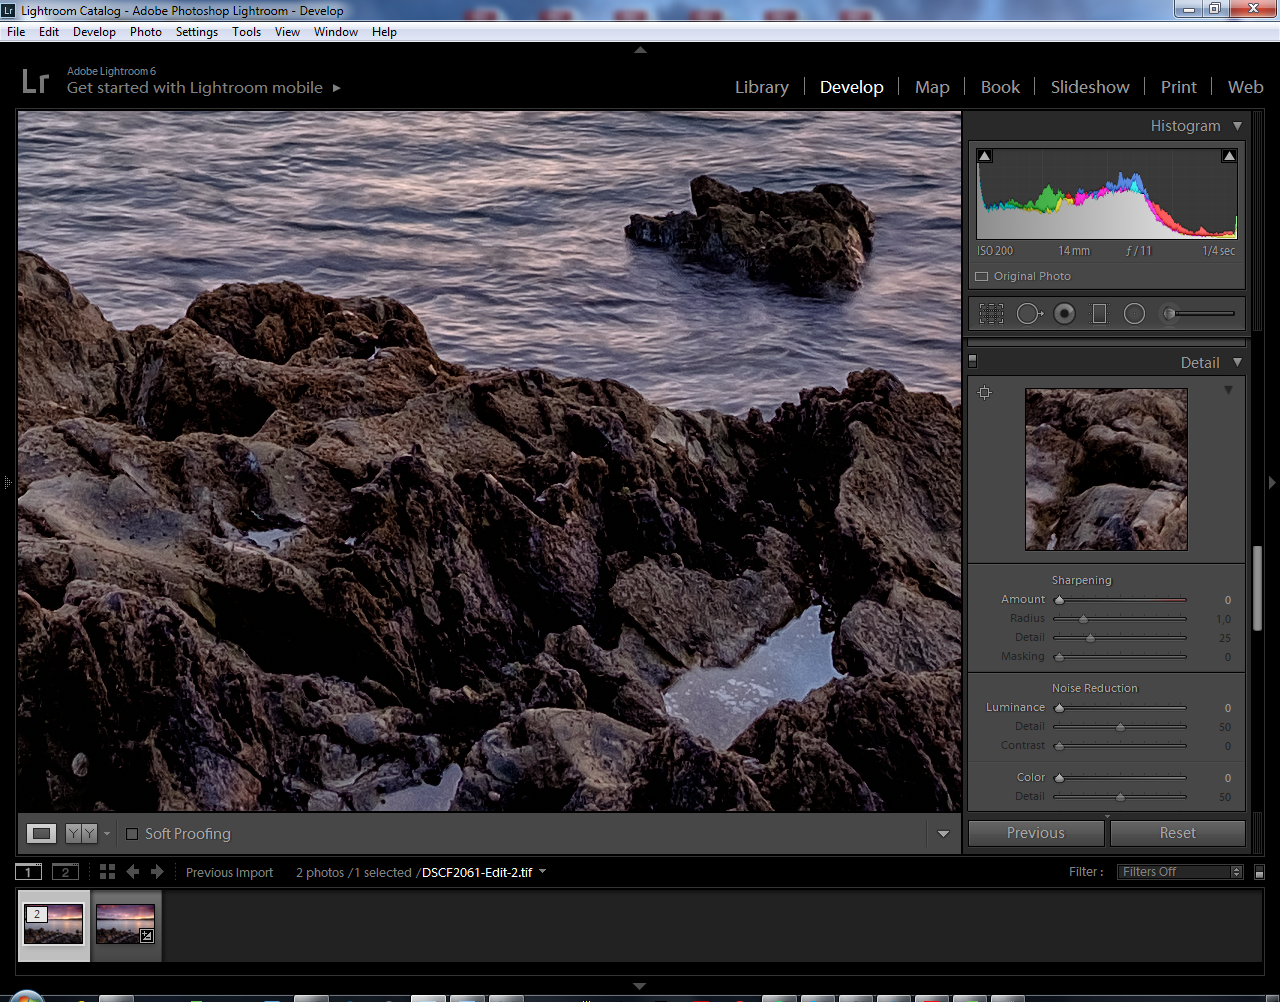
7 But forget everything you did in step 6, replacing the bars to the default values, simply double click on the drag icon. Or, just remove any sharp given by LR, moving the ‘Amount’ bar to 0. Let us rather use the plugin NIK Sharpener Pro, which is part of the plugin offered by Google in https://www.google.com/nikcollection/. To this, in the LR go to ‘Photo’> ‘Edit In’> ‘Sharpener Pro 3: Output Sharpener’. In the window that appears click ‘Edit’.
8 The values, by default, are only and only a starting point, because each image is an image. In ‘Output Settings’ you can select the final destination of photography, or how it will be printed. For our example, I left on ‘Display’ and only adjusted the value of the option ‘Structure’ (which has a somewhat similar effect to ‘Radius’ or even the ‘Clarity’ LR). Zooming the image to 100 percent you will have a more accurate idea of what you’re doing. When finished, make ‘Save’.


9 In short, this sharp tool fromNIK plugin is much more interesting than the Lightroom one. From here, the image will exit directly into the LR cataloging structure where, if you wish, you can continue editing. The difference of sharp, between the two images is evident.
I hope this information has been helpful and I can only wish you good pictures. Have a good time!


Mark Griffiths
April 14, 2016 @ 5:27 pm
Great article and I agree with the Google Nik software does have some really good advantages. Is there a way to sync the Nik adjustments over multiple images like you can with the built in tools?
Elliot Stern
May 2, 2016 @ 11:40 am
good question
Mauricio Reis
May 2, 2016 @ 11:53 am
Sincerely, I think it’s not possible.
Tomas Manrique
August 30, 2018 @ 10:21 pm
Yes. I need to try it out and compare it to unsharp mask in photoshop